The Custom Fields feature is extremely valuable for all Enterprise and Dedicated Plans. With the Custom Fields option you can actually create any field on your Branded Upload Form, allowing you completely customize it. In this article we will show you how to create a custom field, step by step.
After you log in to your account click on ‘Enterprise’ and then ‘Custom Fields’ on the sub menu bar.

From here, you can create multiple custom inputs (fields) for your branded upload forms.
In this example, we will create a template with many fields. The label you choose for your template will be an internal label for you to keep track of your templates as you create more. First, add a name for your template and click Add.

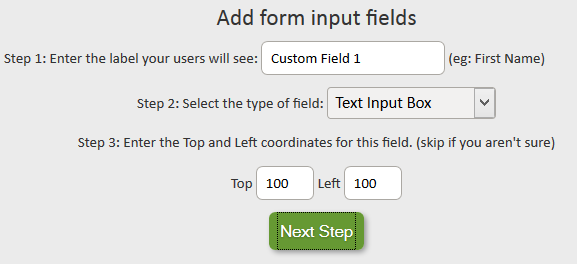
Once you’ve named your template, you should now see two new sections below, a field to edit the name and a field to add form input fields. The first step is to enter the label that your users will see, like a name field, for example.

After you have entered the label, click on ‘Next Step.’ Then, select the type of field from the drop down menu. In this example, we’ll use “text field.”

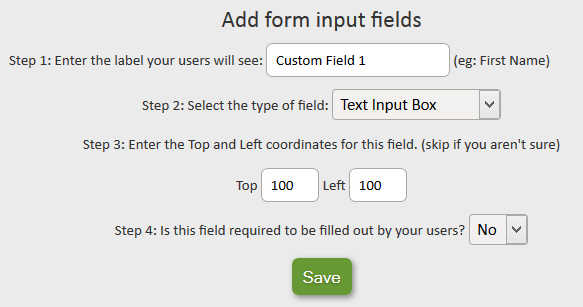
After you’ve made your selection, click ‘Next Step.’ For Coordinates, if you know the exact coordinates on your page, enter them here. If you don’t know them, skip this step and you can customize the field’s location in the Layout function. Click ‘Next Step.’

In the final step, decide if you want this field to be required, or if it is optional. Make your selection from the drop down menu and then click ‘Save.’ (If you make the field required, you will also need to create the message that appears if they try to leave the field empty.)

Now your custom input field is complete and will appear in an editing box below. Repeat these steps for all the input fields you’d like to add. Each input field created will appear below in its own editing box. To make changes to the input field, simply edit and click save. To remove the field, click the red Remove Field button. To change the order of the input fields, use the green “Move Up” buttons.
To put these inputs on your Branded Upload Form, simply click on ‘Branded Forms’ on the sub menu bar and that will take you to your Branded Forms home page. From there click on ‘Edit’ next to the Branded Form you wish to have your Custom Inputs. Next expand Section 5 and click on the drop down menu next to ‘Branded Form Inputs’ and choose the Template you wish to apply. After that, click ‘Save’ at the bottom of the page. To make sure that your Custom Inputs appear on your Branded Form exactly where you want them, click on Layout and follow the step by step guide to customizing the layout of your Branded From.
If you prefer one-on-one assistance, contact our Enterprise Support.

