This is an in depth overview on how to set up a Branded Email for your SendThisFile account so that your outbound notification emails look as if they came from your server. This overview will cover where to add a Branded Email, how to set it up, and explain the customization features you have.
Login on the SendThisFile homepage, look for the ‘Sign up/Login’ in the upper right hand corner. From your Personal File Sending page, click on ‘Settings,’ then ‘Add Branded Email.’

Click on the ‘Name for the new template’ field and type in a name for your new template. You also have the option to choose to send your email in HTML or in Text. For purposes of this example, we will proceed with the HTML version as it is the one most used.
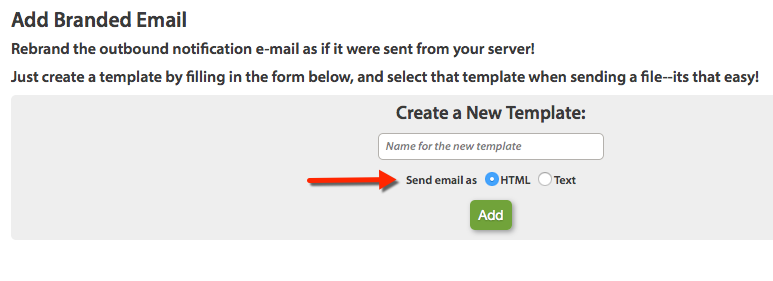
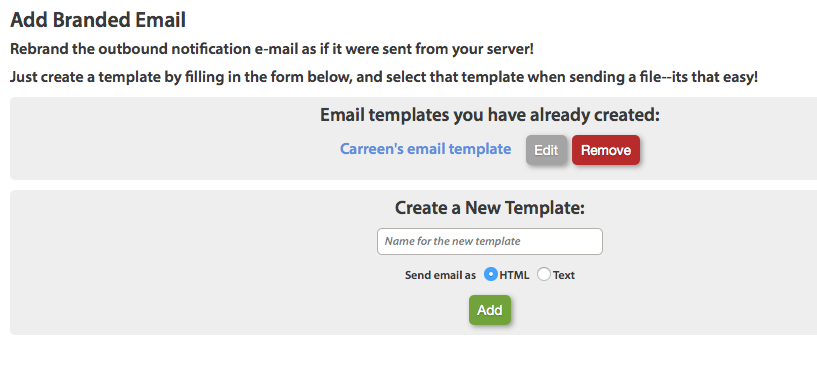
After you’ve named your first file and clicked ‘Add,’ an area called ‘Email templates you have already created’ will appear and the name of the Branded Email you created should populate that area. Next Click on ‘Edit’ – this will allow you to customize your Branded Email.
You can customize individual notifications with the desired wording and images. Each section is a different notification, with the description of what the notification does to the right of the sections title in parentheses. Pictured below are some of the sections:
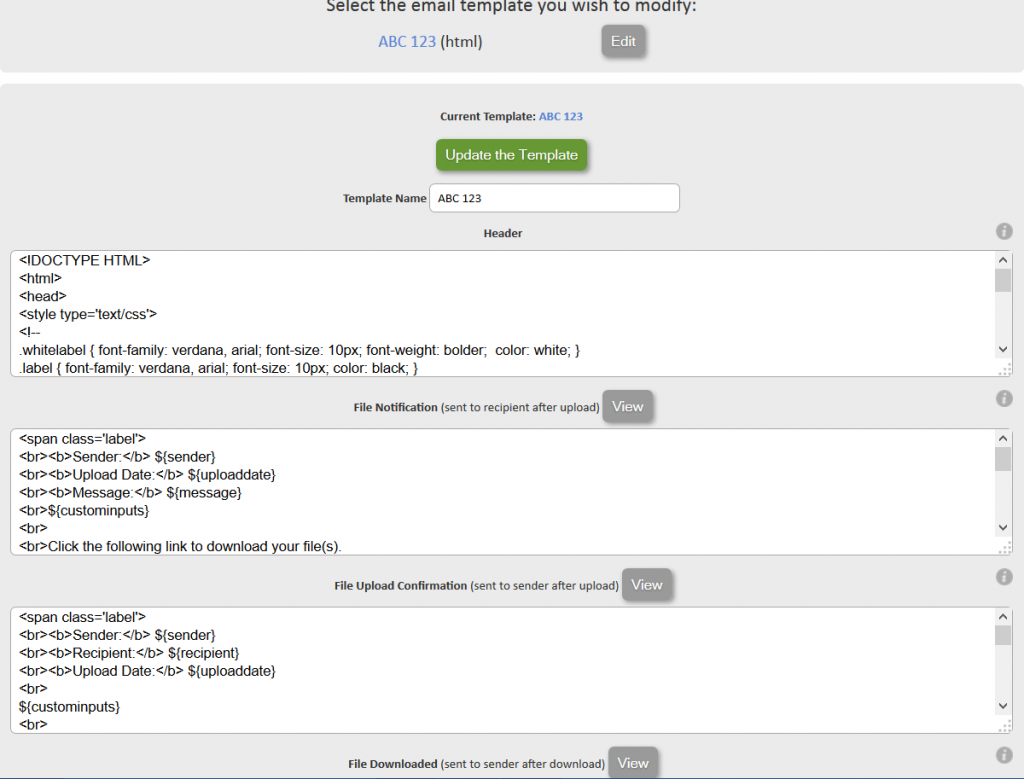
Other sections you can customize are:
- File Downloaded
- Download Limit Reached
- Verification
- Bounced Notification
- Expiration Warning
- User Registration
- Password Reset
- Footer
It is a good idea to have some knowledge of HTML or CSS before undertaking any major changes, but even without that, it’s relatively easy to make small changes that significantly alter the look of your email notifications. You can click on ‘Update the Template’ at the top of the section and then click the ‘View’ button next to the section’s title and description to see your changes.
In this example, we will change the SendThisFile logo on all of the notification emails.
The logo is located in the ‘Header’ section. Any changes that are made in the ‘Header’ or ‘Footer’ section of your Branded Email template will show on every notification; you do not need to change it for each one. First, in the ‘Header’ section scroll down to the bottom of the box. Look for the actual web address where the SendThisFile logo is hosted. Look for [http://www.sendthisfile.com/images/logos/stf_logo_261x53.gif]

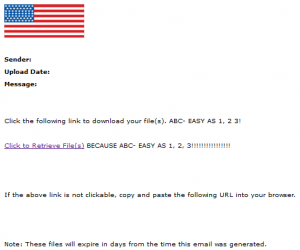
Replace the URL above with the web address of your hosted logo. You may use ‘Ctrl + C’ and ‘Ctrl + V’ to copy/paste your logo URL into the ‘Header’ box. In this example, we’ve replaced the SendThisFile logo with this hosted image of the American Flag:

Click ‘Update the Template’ and then click ‘View’ next to the ‘Header.’ With that image, the header now looks like this:
In this example, we’ll change the text of the “Expiration Warning” notification. This is the email that is sent to the sender when a file is going to expire soon. Scroll down to the section you’d like to change. Within the box you can scroll up and down to see the entire message. In the highlighted text below, the <br> signifies a line break.
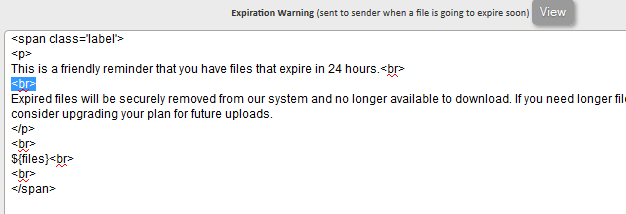
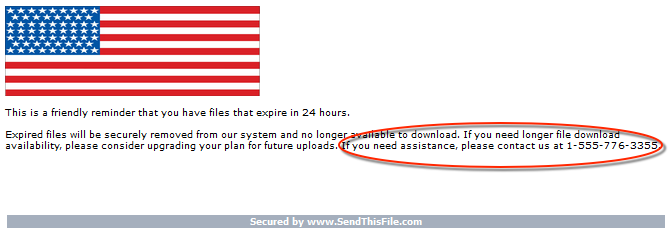
You can change any of the text to suit your needs. In this example, we’ll add an additional sentence, “If you need assistance, please contact us at 1-555-776-3355”. After you have completed your edits, click ‘Update the Template’ at the bottom of the screen.

Now click on ‘View’ next to the name of the notification you’re editing. A window will pop up and show the new notification email and you can see the changes that you’ve made. Here is the edited Expiration Warning notification:
If you followed along, you’ve just successfully created a Branded Email template. You can now use these skills anytime to change all of your notifications. If you need assistance with creating or modifying your Enterprise Branded Email please contact us.


