The My Files section allows you to manage the files that you’ve been sending with your account on a per file basis. It can be extremely useful for making sure that you have the right files available at the right times.
From the My Account home page click on ‘My Files’ on the menu bar.

This will show you a chronological list of the files that have been sent through your SendThisFile account. You can sort by date sent, status, and search by email address or file name.

You can use this to ensure that your file was sent successfully, who it was sent to, ensure that it is active, change the download limit, and forward it on to someone else.
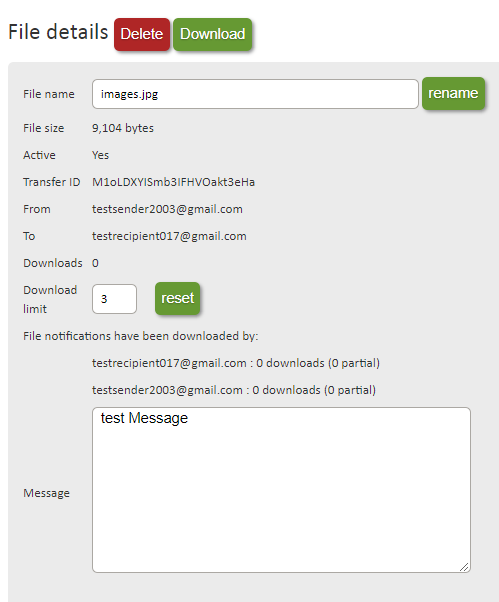
If you click on the name of the file, you will get more details and options. You will be able to manually delete the file, see the number of times it’s been downloaded, and the message that was sent with the file. You will also have the ability to reset the download limit to the number of your choice (remember to set it higher than what you had it set to previously). This is an extremely helpful tool to manage your files and ensure that your files are available when your recipients need them. You will also have the ability to download or delete that file.
You also have the ability to forward a file previously uploaded, from My Files to another recipient without re-uploading the file (available on any paid plan, not Free Plans). This is an extremely efficient tool for resending files and not waiting for the file to upload.
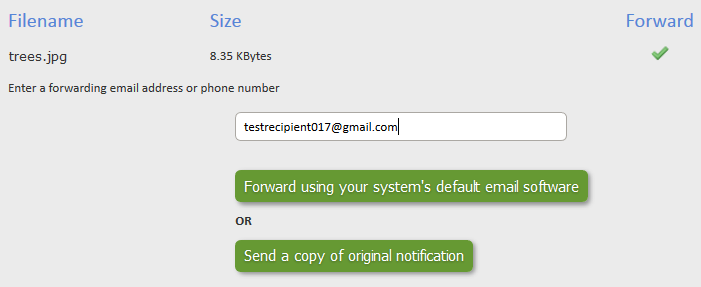
To forward the file, click on ‘forward’ then ‘click to select’ to the right of the file you are forwarding. The next page will ask you to specify which files you would like to forward. Then, enter the email address of the person you want to forward the file to. Next, choose to “forward using your system’s default email software” or “send a copy of the original notification.” In this example we will send a copy of the original notification.
Next is the forwarding screen that will allow you to change the subject line or message box for your new recipient. After you make any needed changes, click on ‘Send Notification’ and your file has now been forwarded to your new recipient.
If you need additional help with the My Files section, please contact our technical support staff.


