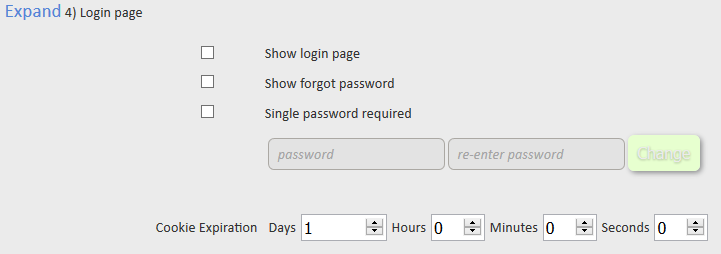
This is an in depth look at one of the most important settings for Enterprise Branded Upload Forms – the security settings. In this section you have the ability to tighten or loosen up the restrictions on who has access to use your Branded Upload Form.
Once you’ve logged in, click on ‘Enterprise’ on the menu bar. Then click on Security in the sub-menu.
This is the security section’s homepage. The following sections are where you make all of the changes to your security settings.
Access Control
Click ‘Expand’ next to Access Control to change who has access (or who is denied access) to your branded upload form. If you’ve never allowed or blocked an email address or domain, you will see a warning, telling you that the upload form will currently allow any address to send files.

To block an email address or domain, simply enter the email address or domain and click Block. The blocked email address or domain will appear in a list below. Once you’ve added all of the addresses or domains to block, there are no more selections to make. To remove a domain or address from the blocked list, simply click Remove and the address or domain will be unblocked.
To allow an email address or domain, enter the email address or domain in the field. Then, from the drop down menu, select “Send or Receive,” “Send Only,” or “Receive Only” then, click Allow. Your allowed email addresses or domains will populate in a list below. To remove an email address or domain from your allowed list, click the Remove button next to the name in the list of allowed addresses or domains.
Password Protected Downloads
Click ‘Expand’ next to Password Protected Downloads to add an additional layer of security. This will give you the option to either mandate having a password, or will give your senders the choice to assign (or not assign) a password to the files they are sending.
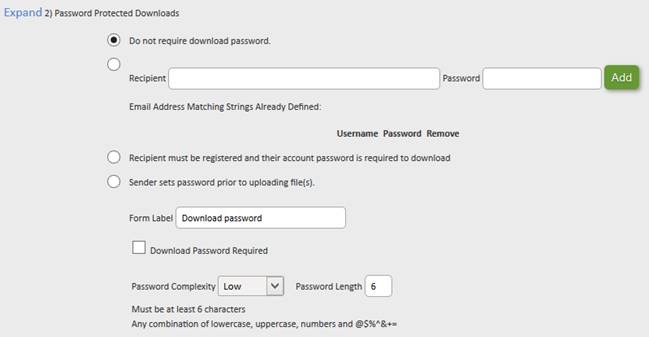
The following are explanations for each password protection method:
Do not require download password – The first option is to not require a download password. By default, a download password is not required. The recipient is taken directly to the download page where the file(s) can be downloaded.
Assigned Download Passwords – The second option is for the account owner or designated admin, to choose the download password for each recipient that will be used on the Upload Form. Simply enter their email address and the password you would like for them to use to download files and then click Add. Their username and password will populate in a list below. (You can also delete their username and password from this list.)
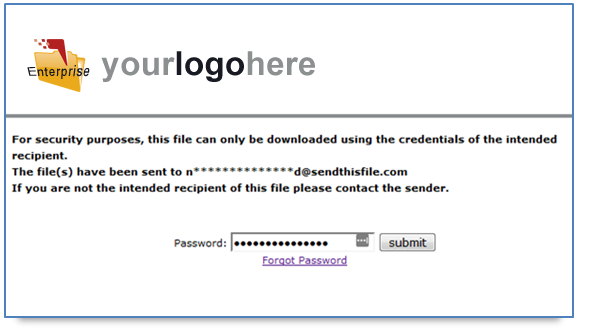
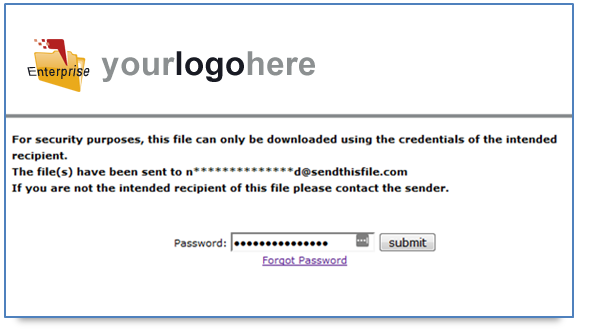
Recipient must be registered and their account password is required to download – The third option is to require that all recipients are registered users with SendThisFile. For this option, the recipient will use their SendThisFile login credentials in order to download the file. If the recipient is not a registered user, they will be prompted to register on the download password page. The user will also be able to reset their password if they have forgotten it. The following are example flows for users that are registered, not registered and if they forgot their password:
In this flow the recipient has already registered and has clicked the download link in the email:
 .
.
In this flow the recipient has clicked the download link in the email and has never registered their email address:
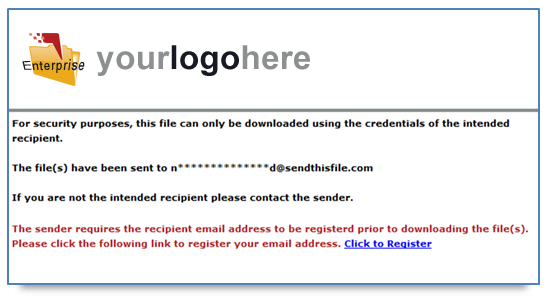
Click on the “Click to register” link.
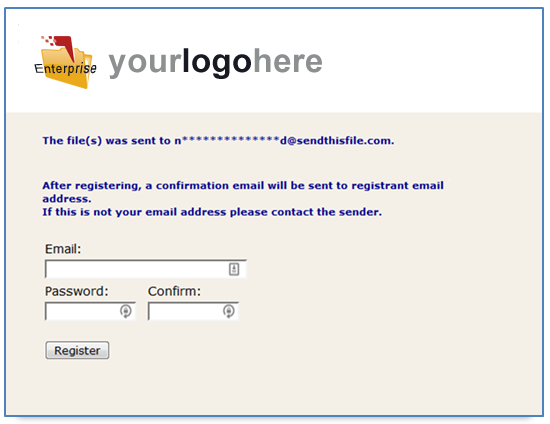
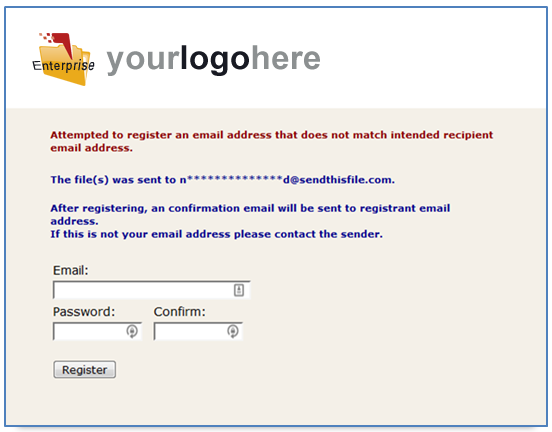
The recipient must register the intended recipient email address. They will not be allowed to register any other email address. Here is an example of registering an email address that was not the intended recipient.
After entering the correct email address and clicking the “Register” button.
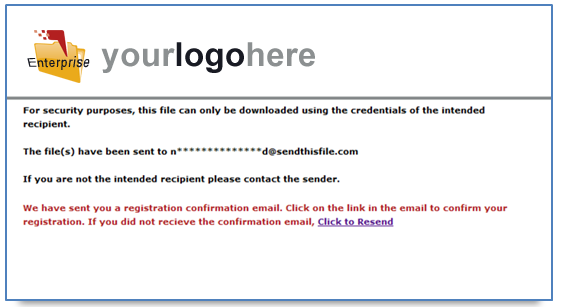
Next the recipient must go to their email inbox find the registration confirmation email we sent and click the confirmation link.
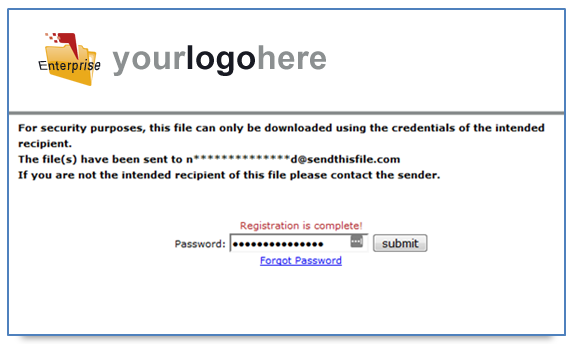
If the recipient is already registered but forgot their password, they will need to reset their password. Here is what that flow looks like after the recipient clicks on the “Forgot Password” link:
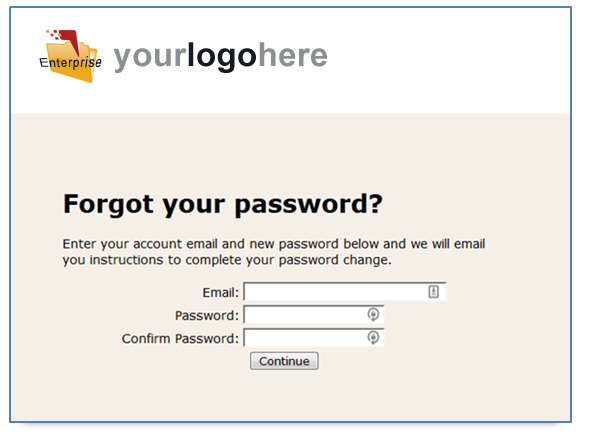
Once the filled in the form and click the “Continue” button.
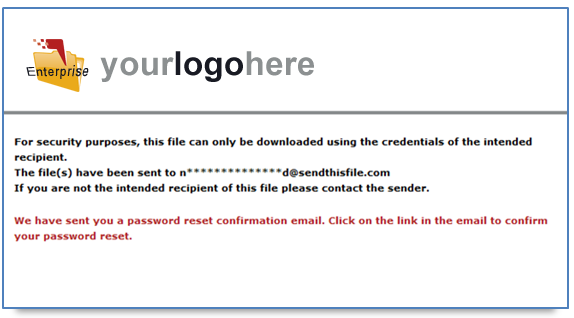
The recipient will get an password change email confirmation in their email inbox containing a confirmation link. The user must click on the confirmation link to complete the change process.
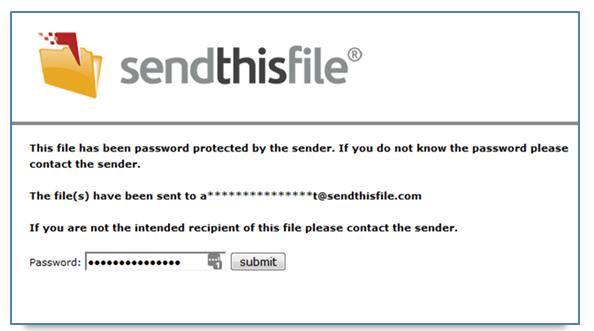
Sender sets password prior to uploading file(s) – The last option allows the sender to set the download password on each of the files that they send. This will require that the sender communicate the password to the recipient through another means. For security reasons, SendThisFile will not communicate the download password to the recipient. To mandate that your users create a download password, click the checkbox next to “Download Password Required.” You can also change the complexity settings for the download password in the section below that option. When set, the recipient will see the following when downloading the file(S)
User Self-Enrollment and Authentication
Click ‘Expand’ next to User Self-Enrollment and Authentication to set parameters for your users.

Simply check the box next to the selection if you would like to require that senders are verified, not to allow them to sign themselves up, and allow new users to change their password. The choices here are dependent on what you and your organization need and want.
Login Page
Before any person has access to or sees your Branded Upload Form, they will be directed to the login page feature, where they will be prompted to enter their registered email address and password as a user of your form. The “Single Password Required” allows you to monitor the password used and change it as frequently as you would like, but remember you will have to distribute that to whomever you wish to send files using this form. The “Cooke Expiration” is part of the internet browser that remembers information entered, such as email and password. You can limit or restrict this here.
Be sure to click the green “Update” button after you’ve made your selection.
If you need additional clarification, please contact our Enterprise support here.


